Showing posts with label Hyper-V. Show all posts

Tuesday, 29 July 2014

[Windows Server 2012 R2] Enable Ping in Hyper-V Windows Server 2012 R2

You have installed Windows Server 2012 R2 on Hyper-V. Added a network adapter. Depending on situation, you have also configured static IP address to your network adapter. Then finally when you tried to run ping command to the Hyper-V, it shows "Request timed out.".

Command Prompt - Ping

At that point of time you might have been wandering is it something when wrong with the network configuration. But fear not, it was actually by default the windows firewall prevent ping command issued to the server.

This obviously can be solved by turning off your windows firewall. But you won't want to do that due to some security concern. So, without actually turning off your firewall, you can change the existing windows firewall inbound rules.

1) Open up your Windows Firewall with Advanced Security. It is located at,
- Control Panel > Windows Firewall > Advanced Settings, or
- Control Panel > Administrative Tools > Windows Firewall with Advanced Security, or
- Run the command "wf.msc" in your command prompt, or
- Run the command "wf.msc" in your Run window.

Windows Firewall with Advanced Security Window

3) Select Inbound Rules located at the left panel. At middle panel, look for File and Printer Sharing (Echo Request - ICMPv4-In). Right click on it and select Enable Rule. If you require to ping through IPv6, then you can enable rule for File and Printer Sharing (Echo Request - ICMPv6-In). Wait for the icon beside the rule to turn green.


That's all for the configuration. By now you should be able to run ping command to your Windows running in Hyper-V.

Command Prompt - Ping

For more details, visit http://blog.blksthl.com/2012/11/20/how-to-enable-ping-in-windows-server-2012/


Saturday, 26 July 2014

[Windows Server 2012 R2] Configure Remote Access to Hyper-V with Multiple Session per User

It is possible to configure same user to have different session when remote access to the same server in Hyper-V. This is of course can be done on a real physical server, but it is advisable to try it out in Hyper-V before messing up the physical server.

Before proceed, ensure that your Hyper-V have network connection and have enabled remote access. Enable Remote Access : http://jaryl-lan.blogspot.com/2014/07/windows-server-2012-r2-enable-disable.html
Enable Internet Access : http://jaryl-lan.blogspot.com/2014/07/configure-internet-access-for-hyper-v.html

To enable multiple session per user.
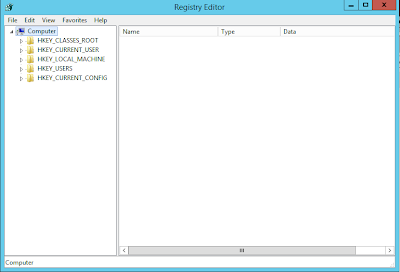
1) In your Hyper-V Server, open up registry editor.

Registry Editor Window

2) Navigate to the following, HKEY_LOCAL_MACHINE\System\CurrentControlSet\Control\TerminalServer.

Registry Editor - Terminal Server Selection
  
3) Look for fSingleSessionPerUser. If it does not exist, create DWORD with the name fSingleSessionPerUser.

4) Right click on fSingleSessionPerUser and click modify.

Registry Editor - Terminal Server - Edit DWORD (32-bit) Value Window

5) Set the value to 0 and click OK. It will then enable same user to have different session.

6) If you want to revert back the setting for each user to have only one session, then just change the value to 1.

For more detail can be found here http://remotedesktoprdp.com/force-single-session-allow-multiple-sessions-per-user

After you have done configure. You can then open up 2 remote desktop window accessing to the same Hyper-V Server with the same user.

If you have previously remote access but did not log off the user session. The next time when you remote access with the same user, a Windows sign-in window will prompt to choose which session to access.

Windows sign-in Window

In the task manager under Users tab, you can see the number of user's session that have previously log on without logging off and its current status.

Task Manager - Users Tab

[Windows Server 2012 R2] Enable / Disable Remote Access to Hyper-V Windows Server 2012 R2

To enable / disable remote access to Hyper-V Windows Server 2012 R2, it is actually quite simple. But it is also essential for your Hyper-V to have network connection to be able to remote access, or else enabling remote access will still not be able remote access to the server since there's no connection.

There are couple of ways to enable / disable remote access and the settings are pretty much similar across different windows server version and edition.

Alternative 1 : Execute command in command prompt.

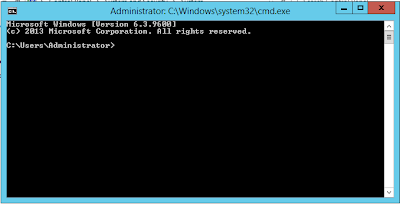
1) In your Hyper-V Server, open up a command prompt. Up to you to use the run command or navigate to the command prompt location to open up the command prompt.

Command Prompt Window

2) To enable, type "C:\Windows\System32\scregedit.wsf /ar 0" without double quote and click enter. If your installed windows is not in C drive, just change C to the drive letter that contain your installed windows.

Command Prompt - scregedit.wcf command

3) To disable, just change 0 to 1 "C:\Windows\System32\scregedit.wsf /ar 1" without double quote and click enter. If your installed windows is not in C drive, just change C to the drive letter that contain your installed windows.

For more detail can be found here http://technet.microsoft.com/en-us/library/jj647785.aspx


Alternative 2 : Using Graphical User Interface.

1) In your Hyper-V Server, navigate to your System window. It can be located from
This PC > System Properties, or
Control Panel > System, or
any other possible way which is more convenient for you.

System Window

2) Click Advance system settings located at left panel in your System window. System Properties window will appear.

System Window - System Properties - Remote Tab

3) Click on Remote Tab. Under Remote Desktop, to enable remote access, select "Allow remote connections to this computer", leave the default check box checked and click OK button. If you want to define which user are allowed to remote access, you can define it at the Select Users... button.

4) To disable remote access, select "Don't allow remote connections to this computer" and click OK button.

That's all for the configuration part and now you can try remote access to your Hyper-V Server.

1) From your server that hosted the Hyper-V Server, open up the remote desktop connection window.

Remote Desktop Connection Window

2) Fill in your Hyper-V Server's computer name and click connect.

Remote Desktop Connection - Windows Security Window

3) Fill up the necessary credentials and click OK button. You will then successfully access to your Hyper-V Server with remote access.

Wednesday, 23 July 2014

Configure Internet Access for Hyper-V in Windows Server 2012 R2

If you owned a Windows Server 2012 R2 and have Installed Windows Server 2012 R2 into your Hyper-V and want to have internet access, you may follow the following steps to setup the network configuration.

Step 1 : At Hyper-V Manager window click on Virtual Switch Manager... located at right side of the panel.

Hyper-V Manager Window

Step 2 : At Virtual Switch Manager window, select New virtual network switch on the left panel, select External on the right panel and click Create Virtual Switch.

Hyper-V Manager - Virtual Switch Manager for - New virtual network switch Selection

Step 3 : Fill in the name field with your desired name. Under Connection type category, select External network radio button and choose your LAN network card in the drop down menu. Leave the check box "Allow management operating system to share this network adapter" checked and click OK button.

Hyper-V Manager - Virtual Switch Manager for - External Selection

Step 4 : By now you will have one additional adapter in your Network Connections window Located at Control Panel\Network and Internet\Network Connections.

Network Connection - Network Adapter

Step 5 (Optional) : You will now need to enable Internet connection sharing by checking the option "Allow other network users to connect through this computer's Internet connection". Enable it from the adapter that have internet connection.

Network Connection - Network Adapter - Properties - Sharing Tab

Step 6 : Back to your Hyper-V Manager window. Right click on the virtual machine that you want to have internet connection and click Settings...

Settings for New Virtual Machine - Add Hardware

Step 7 : Select Add Hardware on the left panel, select Network Adapter at right panel and click Add button.

Settings for New Virtual Machine - Network Adapter

Step 8 : For your Virtual Switch drop down menu, select your created external network adapter that you have done in Step 2 and 3. Click on OK button. By now your virtual machine should have internet connection. If end up like the figure below or no internet connection, proceed to step 9.

Network Connection - Network Adapter - Network Connection Details Window


Step 9 : In your Virtual Machine, configure a static IP address for your adapter. Located at your adapter's properties > Internet Protocol Version 4 (TCP/IPv4) > Click Properties button. Set the Default gateway [192.168.137.1] (Since the shared internet connection pre-configure the IP address to be 192.168.137.1). Set Subnet mask [255.255.255.0]. Set IP address [192.168.137.XX] (XX - Any value other than 1). You may leave the DNS as blank or any of your desired DNS server. The figure below is using google DNS. After done fill up the fields, apply your settings by clicking on OK button. Now you will have Internet connection.

Network Connection - Network Adapter - Properties - Internet Protocol Version 4 (TCP/IPv4) Properties

That's all for the configuration.