Showing posts with label Load Test. Show all posts

Wednesday, 13 July 2016

[Visual Studio] Load Testing Web Application with Web Performance Test [Part 2]

This post is the second part and continuation from this post http://jaryl-lan.blogspot.com/2016/07/visual-studio-creating-web-performance.html. If you are unsure on how to create a Web Performance Test, it is advisable to pay a visit on the first part of the post as this post is about using Web Performance Test to run with Load Test.

So, once you have create and configured your Web Performance Test file. You can then create a Load Test and run it.
Steps to create Load Test.
1) On the Solution Explorer in Visual Studio, right click on your "Web Performance and Load Test Project". Hover to "Add" and click "Load Test...". A window named "New Load Test Wizard" will be prompted.
Add Load Test
Add Load Test
2) On the welcome wizard, click Next button.
New Load Test Wizard - Welcome Screen
3) In Scenario, change the name to your desired value. If your Web Performance Test is only making service call, select "Do not use think times". Whereas if your Web Performance Test contain user interaction on web pages, select either "Use recorded think times" or "Use normal distribution centered on recorded think times" based on what you desired and fill in the time in seconds for "Think time between test iterations". Once you are done, hit on the Next button. (Note: For those who comes from first part of the post, select "Do not use think times" since the Web Performance Test is created for calling services).
New Load Test Wizard - Scenario
4) In Load Pattern, you can choose either Constant Load or Step Load. Constant Load is for the load test to constantly send the same amount of "users" based on the "User Count" value. Whereas Step Load is for the test to start from a smaller amount of "Users" based on the value defined in "Start user count" and slowly increase until it reaches the maximum number of "Users" as defined in "Maximum user count". How fast and how much it increases each time is based on the "Step duration" and "Step user count". Once done, click Next button.
New Load Test Wizard - Load Pattern
5) In Test Mix Model, you can pick either one of the offered options based on what you desired. Each options selected will have pictures and description located at the right side to describe the selected model. Once you have made your choice, hit Next button.
New Load Test Wizard - Test Mix Model
6) In Test Mix, you can add 1 or more Web Performance Test. In case you have not created it or unsure how to create it, head to the first part of the post for more detail about Web Performance Test. So, to add the Web Performance Test file, click "Add..." button. On the "Add Tests" window under Available tests, select your desired test file and hit the "right arrow" button. Once you are done, click OK button to close this window and click Next button to proceed.
New Load Test Wizard - Test Mix
Add Tests to Test Mix
7) In Network Mix, LAN is added by default. If your Web Performance Test is calling the service that exist in local area network, you can just click Next button. Otherwise you can make changes as you see fit.
New Load Test Wizard - Network Mix
8) In Browser Mix, Internet Explorer 9.0 is added by default. You can make any changes as you want here based on your desired browser. After you have completed the changes, click Next button.
New Load Test Wizard - Browser Mix
9) In Counter Sets, you can leave things as default and click Next button. But in case you want to monitor extra stuff, you can click "Add Computer..." and select your desired counter set.
New Load Test Wizard - Counter Sets
10) In Run Settings, you can choose your load test to run in duration or by iterations. In Load test duration, you can set how long the test runs and how long it needs to warm up before sending "users" to your Web Performance Test. Whereas Test iterations is for you to set fix number of users to be sent to Web Performance Test, which means if you set 100 iterations, the load test will only sent 100 users and the test is completed.

In details group box, you can make changes or leave it as default based on what you desired. Click Finish button and visual studio will immediately open the load test file.
New Load Test Wizard - Run Settings
If this is your first time setting up web performance test and load test, there is a chance that you will be unable to run the load test after clicking the "Run Load Test" button. This is due to for some reason the LoadTest2010 database is not created or the database connection is not configured properly. We will go into that on the next post update. But for now, we have to disable the load test from storing information to database. Do take note that by disabling it, you will not be able to see "Summary Report" at Summary tab.
Run Load Test
Run Load Test
Steps to disable database storage. (This steps is for those who have problem related with database or those who do not want to see the summary report)
1) Open up your load test file, select "Run Settings". Right click on it and click properties.
Go to Run Settings' Properties
2) Look for Storage Type and change it to None.
Change Storage Type to None
3) Click "Run Load Test" button.
Run Load Test
Run Load Test
You will see some nice charts and some information for you to monitor. The following are some stuff that you may want to consider to monitor as they provide information on how well your web application performed, the errors to be fixed and possible of noticeable memory leak.
  • Total Requests - shows the number of requests sent to Web Performance Test.
  • Requests/Sec - shows the number of requests the service can process in a second.
  • Failed Requests - shows the number of requests failed to processed by the service.
  • The Max, Min and Avg value for Pages/Sec, Avg. Page Time, Errors/Sec, % Processor Time and Available MBytes.
Load Testing
Load Testing
Load Test Summary
Load Test Summary (Storage Type: Database)
Refer here for the sample project.
https://1drv.ms/u/s!Aj2AA7hoIWHmgnUMr8J4fNegrFDE


[Visual Studio] Creating Web Performance Test for Load Test [Part 1]

Ever thought of how well your web application performed when it is being put to stress test, or how much requests can your web application processed them, or how quick your web application respond to each request when under load. If you have Visual Studio Ultimate Edition (2013 and older) or Visual Studio Enterprise Edition (2015), there is a project called "Web Performance and Load Test Project" specially for Ultimate and Enterprise Edition only. For more details about the comparison between Visual Studio 2015 edition, check them out here https://www.visualstudio.com/en-us/products/compare-visual-studio-2015-products-vs.aspx.

Before creating the project, make sure you have a running web application that are deployed to your IIS or any test machine. It is strongly discourage and make sure not to run the test to your web application that is hosted on your production / live server as it will use up of your network bandwidth and slowdown your web application due to the huge number of requests sent by the load test project need to be processed.

Steps to create a "Web Performance and Load Test Project".
1) On your solution in Visual Studio, right click on it, hover to "Add" and click "New Project...". A window named "Add New Item" will be prompted.
Add New Project
Add New Project
2) On the left pane, expand "Installed" and expand ["Visual C#" for C# or "Visual Basic" for VB], click "Test". Just in case Test is not appearing, look for the search bar located at top right corner, type "Web Performance and Load Test Project" and hit enter key.

3) On middle pane, select "Web Performance and Load Test Project". Fill in your desired name and location. Once you are done. Click "OK" button.
Add New Web Performance and Load Test Project
Once the project is created, you will notice there is a file called "WebTest1.webtest". This is the Web Performance Test file. Again, just in case this file does not appear, you can follow the following steps to create it. Otherwise just skip these steps.

Steps to add a "Web Performance Test" file.
1) On your Solution Explorer in Visual Studio, right click on the "Web Performance and Load Test Project" that you have created earlier. Hover to "Add" and click "New Item...".
Add New Item
Add New Item
2) On the left pane, expand "Installed" and expand further until you see "Test". Click on it. In case you can't find it. Look for search bar at top right corner, type "Web Performance Test" and hit enter key.

3) On middle pane, select "Web Performance Test". Fill in your desired name and location. Once you are done. Click "OK" button.
Add New Web Performance Test
4) Once the file created, it will automatically launch IE with recording. You can just cancel it.

There are a few ways to setup the Web Performance Test file to test your web pages or services.

[Option 1] - Manually fill in your services detail.
Scenario: Assume that you want to make a service call to WCF service that contain parameter and return something back.
1) Open up your Web Performance Test, right click on that "TestCaseUI" and click Add Web Service Request.
Add Web Service Request
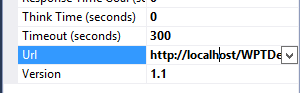
2) Right click on the newly created "Web Service Request" and click properties. Look for Url and change it to your desired URL. In this demo, assuming the following are my Web Service URL. http://localhost/WPTDemo/RedemptionService.svc
Web Service Request - Properties
Properties - Url
Properties - Url
2) Right click on the newly created "Web Service Request" and click "Add Header".
Web Service Request - Properties
3) Expand the headers folder and right click on that only node in the headers folder and click "properties".
Headers - Properties
4) Set the Name field as "SOAPAction". Set the Value field based on your web service action name. The SOAPAction value can be obtained from your web service's wsdl. In this demo, assuming the following are my SOAPAction. http://tempuri.org/IRedemptionService/VerifyUser.
Properties - Name & Value
5) Right click on String Body and click properties.
String Body - Properties
6) Set "text/xml" to Content Type. Set the request content in XML into the String Body. In this demo, assuming the following are my content.

[Request Body]
<s:Envelope xmlns:s="http://schemas.xmlsoap.org/soap/envelope/">
  <s:Header/>
  <s:Body>
    <VerifyUser xmlns="http://tempuri.org/">
      <name>"John"</name>
    </VerifyUser>
  </s:Body>
</s:Envelope>
Properties - Content Type & String Body
[Option 2] - Use recording (Only Get Method for services)
Scenario: Assume that you want to make a REST service call to WEB API with GET Method.
1) Open up the Web Performance Test and click Add Recording button or create a new Web Performance Test file to start recording. An internet explorer browser will be launched.
Add Recording
Add Recording
2) On the browser, paste your desired URL. In this demo, assuming the following are my WEB API service url. http://localhost/WPTDemo/api/Redemption/John. Once you are done. Click the Stop button and the browser will be automatically closed.
Record Calling Web API Service
Note: In case your recording is not working, make sure that the following internet explorer browser's add-ons are enabled.
  • Microsoft Web Test Recorder
  • Web Test Recorder
3) You can remove the unnecessary entries added to your recording.
Recorded
Recorded
Once you have done setting up the Web Performance Test, click the Run Test button to test your service call. Make sure that it is successful and fix it if the test failed.
Run Test
Run Test
Test Result
Test Result
With the Web Performance Test configured, it is now time for load testing. Head over to the following link for the second part of this post. http://jaryl-lan.blogspot.com/2016/07/visual-studio-load-testing-web.html

Refer to the following link for the sample project.
https://1drv.ms/u/s!Aj2AA7hoIWHmgnSNDD55and-C7Ge