Friday, 18 December 2015

Pineng PN-920 20000mAh Review

Couple of weeks back I have bought the Pineng PN-920 from 11Street for a discounted price, but too bad it doesn't comes with a free pouch. It is original and can be verified at pineng official website http://pineng.com.my/Product-Verification. It is huge, bigger and heavier than most of the phones.

pineng 920 input output light pineng 920 Description pineng 920 output led light pineng 920 input led light pineng 920 torch light pineng 920 brand pineng 920 button
PN-920

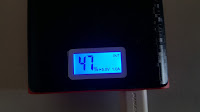
The light is blue for the LCD screen on the PN-920 and it can be quite irritating and uncomfortable to the eyes due to its brightness. The LCD screen will display some information whenever you perform the following:
  • Hold the button for a couple of seconds (Display the remaining percentage with the word "OUT")
  • Double click the button (Display the remaining percentage with the word "OUT" and turn on the flashlight)
  • Charging the PN-920 (Display the remaining percentage with the word "IN")
  • Charging the phone with 5V 1A port and/or 5V 2.1A port (Display the remaining percentage with the word "OUT" and shows 5V 1A and/or 5V 2.1A)
The LCD display can be turned off by holding the button for a couple of seconds and turning off the flashlight can be done by clicking the button once. For more details about PN-920, you can check it out at http://pineng.com.my/PINENG-PN-920-20000mAh-Power-Bank-Black.

** NOTE: The following result may not be accurate due to the measurement are done through software and not dedicated hardware tools. The result is just to give you a general idea on how well it performs.

** NOTE: Using different micro usb cable may affect the charging speed. Other than that, the phone charging speed is slower when charging above 80%.

Measuring on how many times it can fully charged a phone may not be that accurate, this is due to different phones have different battery capacity and some phones consume more battery in the background. So I hope that the following test will give you a general idea on how many times it can fully charge a phone and how fast it can charge a phone with 5V 1A. To test how well PN-920 perform, the following are used:
  • Samsung Galaxy Note 5
  • Pineng PN-920
  • Micro usb cable (Pineng)
  • Battery Monitor Widget
  • Stopwatch
This test will be done in every 1 hour time frame to charge the Samsung Galaxy Note 5 while plugged on 5V 1A port on the PN-920. The phone screen, wifi, data is turned off and only the default applications and Battery Monitor Widget is running. Same micro usb cable is used throughout the test.

No. Phone Battery (%) Phone Battery (°C) PN-920 Battery (%) State
1 21 30.3 90 Charging
66 32.8 83 Unplugged
2 20 31.6 83 Charging
66 33.0 76 Unplugged
3 21 32.4 76 Charging
67 35 70 Unplugged
4 20 29.8 70 Charging
66 32.3 60 Unplugged
5 21 30.4 60 Charging
65 33 50 Unplugged
6 21 30.8 50 Charging
67 33.3 36 Unplugged
7 22 31 36 Charging
67 34.5 26 Unplugged
8 22 31.5 26 Charging
67 34.5 19 Unplugged
9 20 30.4 19 Charging
66 33.8 11 Unplugged

Based on the table above, it seems that the battery percentage on the PN-920 drop a lot when it is below 70%. In 1 hour time frame, the battery percentage increased between 44-46% for the Samsung Galaxy Note 5 with 5V 1A port. It will need more than 2 hours to fully charge the phone from 0% to 100%, which is very slow. So it is advisable to plugged to the 5V 2.1A port on the PN-920 to charge faster. But do take note that charging faster would lead to your PN-920 battery deplete faster and some of the very old phones can only accept up to 5V 1A.


Friday, 20 November 2015

Creating Windows Task Scheduler with Task Scheduler Managed Wrapper in C# & VB

While discussion with my mentor Serena Yeoh about creating Task Scheduler in code and we stumble upon Task Scheduler Managed Wrapper. This is a wrapper to the Windows Task Scheduler. For more detail, you can check it out from the following link. https://taskscheduler.codeplex.com/. There are other ways to create and manage the task scheduler, including PowerShell. But in this post, I'm going to just focus on Task Scheduler Managed Wrapper.

Creating task scheduler in code is pretty much straight forward. There are a few mandatory information you need to provide when creating a task scheduler, which is the name of the task scheduler, trigger (one time, daily, weekly, monthly) and the action (EG: execute an application). The rest of it are optional.

To use the Task Scheduler Managed Wrapper, you need to get the package from NuGet called "Task Scheduler Managed Wrapper". Once done, instantiate a new instance of TaskService.

[C#]
TaskService taskService = new TaskService();

[VB]
Dim taskService As TaskService = New TaskService()


TaskDefinition is required to be used for defining your actions and triggers, which is the mandatory information for creating task scheduler. TaskDefinition can also be used to define other optional information, such as task scheduler's description, when the task scheduler being created, who created the task scheduler and many more.

[C#]
TaskDefinition taskDefinition = taskService.NewTask();

[VB]
Dim taskDefinition As TaskDefinition = taskService.NewTask()


Once the TaskDefinition has been instantiated, we can start defining the trigger. In task scheduler, there are 4 different types of trigger (One Time, Daily, Weekly, Monthly). Each of them is using different trigger class (instantiate TimeTrigger() for [One Time], instantiate DailyTrigger() for [Daily], instantiate WeeklyTrigger() for [Weekly], instantiate MonthlyTrigger() for [Monthly]).

While all the triggers needs the start time by supplying the value to StartBoundary property, some of the trigger requires additional information. Such as the recurring days for daily schedule, recurring weeks for weekly schedule, the scheduled days of the week, and so on.

The following are the trigger example for daily. The task scheduler will be triggered every 2 days and the task scheduler will be triggered after 3 minutes from the current date time.

[C#]
DailyTrigger dailyTrigger = new DailyTrigger();
dailyTrigger.DaysInterval = 2;
dailyTrigger.StartBoundary = DateTime.Now.AddMinutes(3);

[VB]
Dim dailyTrigger As DailyTrigger = New DailyTrigger()
dailyTrigger.DaysInterval = 2
dailyTrigger.StartBoundary = DateTime.Now.AddMinutes(3)


Once you have define your trigger, add them to your TaskDefinition.

[C#]
taskDefinition.Triggers.Add(trigger);

[VB]
taskDefinition.Triggers.Add(trigger)


Next we will define the action for the task scheduler. ExecAction class will be used to define the application's executable path and its argument if any. The following code define the action to launch command prompt.

[C#]
ExecAction execAction = new ExecAction(@"C:\Windows\System32\cmd.exe");

[VB]
Dim execAction As ExecAction = New ExecAction("C:\Windows\System32\cmd.exe")


After define your action, add them to your TaskDefinition.

[C#]
taskDefinition.Actions.Add(execAction);

[VB]
taskDefinition.Actions.Add(execAction)


With both trigger and action defined, you can now create the task scheduler. The following code will create a task scheduler with a name "SampleTask" and it is located in the root path of your Task Scheduler Window.

[C#]
taskService.RootFolder.RegisterTaskDefinition("SampleTask", taskDefinition);

[VB]
taskService.RootFolder.RegisterTaskDefinition("SampleTask", taskDefinition)


You can check out the sample code here https://onedrive.live.com/redir?resid=E6612168B803803D!348&authkey=!AG20kICe6IVyxiU&ithint=file%2czip . For more examples, you can check it out from the github https://github.com/dahall/taskscheduler.

Friday, 13 November 2015

Thread Synchronization with Semaphore and how to Implement it in C# & VB

In the previous couple of posts, I have posted about aquiring exclusive lock with SpinLock http://jaryl-lan.blogspot.com/2015/08/exclusive-lock-with-spinlock-c-vb.html or with Mutex http://jaryl-lan.blogspot.com/2015/08/thread-synchronization-with-mutex.html. So for today, I'm going to post about something different yet it can still provide exclusive right to a thread in a multi-threaded environment, which is Semaphore.

Semaphore is used to control the number of concurrent threads to access a particular section of the code / resources. With the ability to control the number of concurrent threads, It can do more than just acquiring exclusive lock by limiting to 1 thread. I will demonstrate on how to use Semaphore to control the concurrent threads with an example. The example below is by no means the best practice, it is just to show how Semaphore works.

Imagine that you need to process more than 1 file at the same time with FileSystemWatcher. By default, the event only process 1 file at a time. So to process multiple file at the same time and control the threads, we will use Task.Run to simulate fire-and-forget and Semaphore to control the threads.

As usual, you need an instance of Semaphore. The following constructor accept 2 parameters. The first parameter define the number of free / available requests can be accepted. The second parameter define the maximum number of concurrent threads. In this case, we have 3 available requests and can accept only up to 3 concurrent threads.

[C#]
Semaphore semaphore = new Semaphore(3, 3);

[VB]
Dim semaphore As Semaphore = New Semaphore(3, 3)


In your FileSystemWatcher's created event, call WaitOne() to occupy 1 available request. If the request is not available, it will wait until a new request is available.

[C#]
semaphore.WaitOne();

[VB]
semaphore.WaitOne()


We will use Task.Run to execute the method in another thread. In that method, call Release() to release the request. Allowing another thread to acquire the available request.

[C#]
semaphore.Release();

[VB]
semaphore.Release()


If you play around with the sample code, you will notice that the thread id is different from when it call WaitOne() and call Release(). This is due to the thread that execute Task.Run spawn a new thread and since it did not call await or .Wait() for the Task.Run, it end up leaving the Task.Run without waiting for its completion and exit the method. To re-explain this in steps, 
  1. Thread A call WaitOne() and execute Task.Run.
  2. Task.Run spawn a new thread B to further execute the method specified in Task.Run. 
  3. Thread A leaves without waiting thread B completes its execution and exit the method. (fire-and-forget)
  4. Thread B executing the method and call Release().

List of Additional Funtionality to Include During Self Install Windows Service in C# & VB

To continue on the previous post about self install a windows service. http://jaryl-lan.blogspot.com/2014/09/create-simple-windows-service-and-self.html. Have you ever been wondering what else can you do during installation of the windows service? Well, you can include methods or functionalities that only requires to execute once that are not suitable to be called during the windows service is running. So, let's look into the list of methods or functionalities to be included.


Create Event Log & Source

If you need to write logs into the event log with custom log and source, it is advisable to create them during windows service installation. This is because writing log into event log requires the log and source to be there. The good thing is that if it does not exist, the code will attempt to create the log and source. But if the Windows Service is launched with a user with low-privilege, then the service will throw an exception due to the user did not have the permission to creation of log and source. For more detail on dealing with Event Log, you can refer to the following link. http://jaryl-lan.blogspot.com/2015/09/create-configure-and-write-to-event-log.html


Automatically Start / Stop the Windows Service During Installation & Uninstall

To simplify the installation, you may want to consider starting the service for the user after installation. Otherwise the user need to manually start the windows service by launching the Services window to find the installed windows service. Also, there's a high chance that the user is not aware of the windows service name.

[C#]
using (var serviceController = new ServiceController(_serviceName))
{
    if (serviceController.Status != ServiceControllerStatus.Stopped) return;

    serviceController.Start();
    serviceController.WaitForStatus(ServiceControllerStatus.Running);
}

[VB]
Using ServiceController As ServiceController = New ServiceController(_serviceName)
    If Not ServiceController.Status = ServiceControllerStatus.Stopped Then
        Exit Sub
    End If

    ServiceController.Start()
    ServiceController.WaitForStatus(ServiceControllerStatus.Running)
End Using

Other than that, you may want to stop the service before uninstall the windows service. When the windows service is stopping, the OnStop method will be executed, so you can write the necessary code to do some cleanup in the method.

[C#]
using (var serviceController = new ServiceController(_serviceName))
{
    if (serviceController.Status != ServiceControllerStatus.Running) return;

    serviceController.Stop();
    serviceController.WaitForStatus(ServiceControllerStatus.Stopped);
}

[VB]
Using ServiceController As ServiceController = New ServiceController(_serviceName)
    If Not ServiceController.Status = ServiceControllerStatus.Running Then
        Exit Sub
    End If

    ServiceController.Stop()
    ServiceController.WaitForStatus(ServiceControllerStatus.Stopped)
End Using


Windows Service Recovery

For those who are unaware about Windows Service Recovery, you can actually configure them in the Recovery Tab by navigating to the Windows Service's properties and look for the Recovery Tab. But it can be tedious to configure each and every Windows Service that you have installed. To simplify this, recovery settings should be set during Windows Service installation. There are couple of ways to do it, but I will only demonstrate how to set it using command line with Process class.

The arguments specified in the code below will do the following:
  • The error count will be reset after 3600 seconds.
  • The Windows Service will restart itself when it gets terminated unexpectedly for the first and second failure (After 5 minutes).
  • The subsequent failure will attempt to execute the windows service with the argument "-email" (After 30 seconds).

[C#]
using (var process = new Process())
{
    var startInfo = process.StartInfo;
    startInfo.FileName = SC_COMMAND;
    startInfo.Arguments = string.Format("failure \"{0}\" reset= 3600 actions= restart/300000/restart/300000/run/30000 command= \"\\\"{1}\\\" -email\"", _serviceName, executableLocation);

    process.Start();
    process.WaitForExit();
}

[VB]
Using process As Process = New Process()
    Dim startInfo = process.StartInfo
    startInfo.FileName = SC_COMMAND
    startInfo.Arguments = String.Format("failure ""{0}"" reset= 3600 actions= restart/300000/restart/300000/run/30000 command= ""\""{1}\"" -email""", _serviceName, executableLocation)

    process.Start()
    process.WaitForExit()
End Using


Display Error Message for Failed Installation / Uninstall

It is best to show an error message whenever an installation or uninstall for the windows service is being performed, otherwise it will be hard and tedious to trace the problem (Check installation log and Event Log) & the end user that does the installation or uninstall may not aware on how to trace the problem. With a proper and meaningful error message being displayed, the user will be aware of the error and might be able to perform the necessary action or amendment to fix the problem and then retry the installation or uninstall of the windows service.

The sample code can be obtained here. https://onedrive.live.com/redir?resid=E6612168B803803D!345&authkey=!AOIm5LtxJbwXoQo&ithint=file%2czip

Saturday, 26 September 2015

Create, Configure and Write to Event Log in C#, VB and PowerShell

Some of you might be familiar with checking out the errors and information with Event Viewer for tracing or troubleshooting purposes. Those logs' information can be written using EventLog class that are available in .NET Framework since version 1.1. Other than using code, the same thing can be achieved using PowerShell.

Here are a few things to take note when dealing with EventLog. 
  • You can't create a log that are belongs to an existing source
  • You can't create a source that is already exists on another log.
  • The first eight characters of the log name cannot be the same as the existing log name.
  • You can't delete a source's name that has the same as log name.
  • Moving a source by deleting the source from a log and then creating the same source to a different log will not work until the machine is being rebooted. Which means, if you attempt to move the source from 1 log to another log. Writing an event to this source will still appear on the previous log. To remedy this, just reboot the machine.
You might not aware of what log and source is all about. To clarify this, log is the place that holds all the written logs. By default, there are 3 logs (Application, Security, System) and they are located at the left pane of the Event Viewer window. On the other hand, the source is for you to identify which applications it belongs to. Each log can contains 1 or more sources but each source can only be tied to a single log.

This is how you can write an event to event log. Unlike code, it is mandatory to fill in the log and eventid for PowerShell. Eventid is for you to define or customize, it can be something like an error code. But in this case, we can leave the eventid as 0. If you want to change the event's default icon (Information) to something else, just change the entrytype value.

[C#]
EventLog.WriteEntry("SourceName", "Message"EventLogEntryType.Information);

[C# Alternative]
using (EventLog eventLog = new EventLog())
{
    eventLog.Source = "SourceName";
    eventLog.WriteEntry("Message", EventLogEntryType.Information)
}

[VB]
EventLog.WriteEntry("SourceName", "Message"EventLogEntryType.Information)

[VB Alternative]
Using eventLog As EventLog = New EventLog()
    eventLog.Source = "SourceName"
    eventLog.WriteEntry("Message", EventLogEntryType.Information)
End Using

[PowerShell]
write-eventlog -logname LogName -source SourceName -message "Message" -eventid 0 -entrytype Information


The following is for you to create a new log and the log's source. When creating a new log with the source's name and the log's name is different, a source with the same name as the log's name will be created automatically.

[C#]
EventLog.CreateEventSource("SourceName", "LogName");

[VB]
EventLog.CreateEventSource("SourceName", "LogName")

[PowerShell]
new-eventlog -logname LogName -source SourceName


If you want to change the log's maximum size and the action to take if reached the maximum size, you can do so with the following code. What the following does is to set the maximum size to 2048 KB and delete the oldest event if exceeded the maximum size.

[C#]
using (EventLog eventLog = new EventLog(LOG_NAME))
{
    eventLog.MaximumKilobytes = 2048;
    eventLog.ModifyOverflowPolicy(OverflowAction.OverwriteAsNeeded, 0);
}

[VB]
Using eventLog As EventLog = New EventLog(LOG_NAME)
    eventLog.MaximumKilobytes = 2048
    eventLog.ModifyOverflowPolicy(OverflowAction.OverwriteAsNeeded, 0)
End Using

[PowerShell]
limit-eventlog -logname LogName -maximumsize 2048KB -overflowaction overwriteasneeded

Other than configuring them in code or with PowerShell, you can do so through the Event Viewer window by navigating to the log's properties.

Monday, 31 August 2015

Encryption with Angularjs-Crypto

Recently, I have the need to look into encrypting / decrypting content in javascript when sending / receiving from the server through Web API. My mentor, Serena Yeoh suggest me to check out the AngularJS-Crypto, so today I will share this with you guys. Before reading further, it is advisable to have a basic knowledge on AngularJS and ngResource. Otherwise you will have hard time understanding how the code is being written.

AngularJS-Crypto integrates the functionalities from CryptoJS and is required to use it together with ngResource. It allows encrypting the properties of the object based on a keyword or encrypt the whole object before sending over to the server. For more details about AngularJS-Crypto and how to integrate it to your project, you can refer from this link https://github.com/pussinboots/angularjs-crypto

Ensure that you have all the necessary scripts. The following are the list of required scripts.
  • angular.js
  • angular-resource.js 
  • angularjs-crypto.js 
  • CryptoJSCipher.js
And the following 2 scripts for using AES encryption with ECB mode. 
  • aes.js
  • mode-ecb.js
In your angular module, add the dependency angularjs-crypto.

[Javascript]
angular.module('sampleModule', ['ngResource''angularjs-crypto'])

Here are a few things you can do in the run blocks for initializing the crypto.
  • Set the encryption key to base64Key or use the function base64KeyFunc for dynamically change the key. The key needs to be in base64 format.
  • Define the type of encryption algorithm.
  • Define the pattern and only encrypt the object's property that contains or match the pattern.
So in this case, the algorithm used is AES and encrypt / decrypt the object's property that contains the name "content".

[Javscript]
.run(['$rootScope''cfCryptoHttpInterceptor'function ($rootScope, cfCryptoHttpInterceptor) {
    cfCryptoHttpInterceptor.base64KeyFunc = function () {
        return $rootScope.base64Key;
    }
    cfCryptoHttpInterceptor.plugin = new CryptoJSCipher(CryptoJS.mode.ECB, CryptoJS.pad.Pkcs7, CryptoJS.AES)
    cfCryptoHttpInterceptor.pattern = "content";
}])

Next, create a factory to implement $resource to invoke the services that are created with Web API. The following is for encrypting / decrypting object's property only. Encryption / decryption will only be enabled when crypt is set to true.

[Javascript]
$resource('sample'null, {
    post: {
        method: 'POST',
        crypt: true
    }
});

The following is for encrypting / decrypting whole object. Encryption will only be enabled when fullcryptbody is set to true and decryption will be enabled when decryptbody is set to true.

transformRequest is used to intercept the content before sending it to the server. In this case, for the Web API to understand the string value from the body, the content will be supplied with the double quote added at the beginning and at the end before sending to server.

transformResponse is used to intercept the result received from the server. In this case, the value returned through Web API contains double quote. Before decrypting the content, the double quote located at the beginning and at the end of the content needs to be removed.

[Javascript]
$resource('sample'null, {
    post: {
        method: 'POST',
        fullcryptbody: true,
        decryptbody: true,
        transformRequest: function (data, headers) {
            return '"' + data + '"';
        },
        transformResponse: function (data, headers) {
            return data.slice(1, -1);
        }
    }
});

For changing the encryption key, just assign the value to the base64Key. The function base64KeyFunc will be called whenever $resource is invoked.

[Javascript]
$scope.$root.base64Key = '16rdKQfqN3L4TY7YktgxBw==';

That's all for setting up the encryption in javascript. Just invoke your service from javascript and the server will receive your encrypted data.

If you want to know how the server decrypt the content sent from client and encrypt it back to client. You can check out from the sample code here https://onedrive.live.com/?id=E6612168B803803D%21337&cid=E6612168B803803D&group=0&parId=E6612168B803803D%21165&authkey=%21AFMOI7ZQ%2DtGFxKM&action=locate

Sunday, 30 August 2015

Thread Synchronization with Mutex and How to Implement it in C# & VB

Previously, I have posted about acquiring exclusive lock with SpinLock http://jaryl-lan.blogspot.com/2015/08/thread-synchronization-with-spinlock.html. Today, we will look into how to implement and use the Mutex. [I would like to give credits to Serena Yeoh for introduce this to me.]

The purpose for SpinLock and Mutex are quite similar, which is for applications that deal with multiple threads and every threads requires to have exclusive right to perform a task. But unlike SpinLock, Mutex are not limited to current process and can share across different processes. In Mutex, threads that are waiting for acquiring the lock are waiting for signal from the thread that is holding the lock.

To use the Mutex, An instance of a Mutex is required.

[C#]
Mutex mutex = new Mutex();

[VB]
Dim mutex As Mutex = New Mutex()

The code above can only be used in the current process. To share the Mutex across other processes, you need to give the Mutex a name. Here are a few things to take note when instantiating an instance of Named Mutex. For more details, https://msdn.microsoft.com/en-us/library/system.threading.mutex.aspx & https://msdn.microsoft.com/en-us/library/windows/desktop/ms682411(v=vs.85).aspx.
  • The name given to the Mutex are case sensitive, so make sure to take note of the name's casing when you want to share the same Named Mutex across your applications.
  • There are two types of prefix, which is "Global\" and "Local\". By default, if you do not specify any prefix for the Named Mutex, it will be "Local\".
  • If you need to share your Mutex across different Environment (For Example: Web Application, Windows Application), you need to include the prefix "Global\" in the name of the Mutex.
  • Other than prefix, the remaining character for the Named Mutex cannot contain backslash (\).
Other than that, you need to define the security access for the Mutex. This is to allow other processes that are launched by different user to share the same Mutex.

What the following code does is to try and get the existing Named Mutex. If is doesn't exist, a new Named Mutex will be created. Regarding the parameter MutexRights, specifying synchronize is to allow the thread to wait for the Named Mutex's lock. As for Modify, it is to allow the thread to release the lock of the Named Mutex.

The SecurityIdentifier is to define what kind of users can use the Named Mutex, in this case, specifying WorldSid is to allow all users (also known as Everyone) to use the Named Mutex.

[C#]
if (!Mutex.TryOpenExisting(MUTEX_NAME, MutexRights.Synchronize | MutexRights.Modify, out mutex))
{
    bool createdNew;
    MutexAccessRule mutexAccessRule = new MutexAccessRule(new SecurityIdentifier(WellKnownSidType.WorldSid, null), MutexRights.Synchronize | MutexRights.Modify, AccessControlType.Allow);

    MutexSecurity mutexSecurity = new MutexSecurity();
    mutexSecurity.AddAccessRule(mutexAccessRule);

    mutex = new Mutex(false, MUTEX_NAME, out createdNew, mutexSecurity);
}

[VB]
If mutex.TryOpenExisting(MUTEX_NAMEMutexRights.Synchronize Or MutexRights.Modify, mutex) Then
    Dim createdNew As Boolean
    Dim mutexAccessRule As MutexAccessRule = New MutexAccessRule(New SecurityIdentifier(WellKnownSidType.WorldSid, Nothing), MutexRights.Synchronize Or MutexRights.Modify, AccessControlType.Allow)

    Dim mutexSecurity As MutexSecurity = New MutexSecurity()
    mutexSecurity.AddAccessRule(mutexAccessRule)

    mutex = New Mutex(False, MUTEX_NAME, createdNew, mutexSecurity)
End If

mutex.WaitOne is to acquire the lock and wait for the lock to be released if is owned by other thread.

[C#]
mutex.WaitOne();

[VB]
_mutex.WaitOne()

mutex.ReleaseMutex is to release the lock and to enable other threads to acquire the lock.

[C#]
mutex.ReleaseMutex();

[VB]
_mutex.ReleaseMutex()

By using the same scenario as specified in my previous blog post about SpinLock. Race Condition will not happen if used together with Mutex. By running the sample code for SpinLock and Mutex, you will notice that SpinLock are much faster compared to Mutex.

The test is run with the following specification:
Operating System: Windows Server 2012 R2 64 Bit
Processor: Intel Core i7-4800MQ Processor
RAM: 16GB, Dual Channel, DDR3

Parallel Loop for 1,000,000 times.
Elapsed time for SpinLock: 126.08 ms ~ 129.57 ms
Elapsed time for Mutex: 2774.81 ms ~ 2868.85 ms

Hold it. Don't jump to a conclusion that SpinLock is better than Mutex. In this test, what i'm doing is just changing a single variable value. This means that each threads acquire the lock and release it in a very short duration, in which it can be ideal for SpinLock. But if the thread takes a very long time to complete a task, you will see the performance of the application starts to degrade. SpinLock will also affect other processes' performance while waiting for the lock to be release from the thread, since it uses CPU cycle while spinning in the loop.

You can get the sample code about Mutex from the following link. https://onedrive.live.com/redir?resid=E6612168B803803D!334&authkey=!ACaO5bWfJ1DdEJs&ithint=file%2czip